Quick start
This page is the shortest path from nothing to a working Bor setup: one server, one enrolled desktop, and one Firefox policy that you can see take effect on the endpoint. Each step links to the detailed page if you need more options. Plan for about 20 minutes.
The example uses a Debian or Ubuntu server and the hostname
bor.example.com. For other distributions, follow the matching tab in
Installing the server.
Before you begin
You need:
- A Linux host for the server that desktops can reach by name on TCP ports 8443 and 8444. See Requirements.
- One Linux desktop with Firefox installed, to act as the first managed node.
- Root access (
sudo) on both machines.
Default port in this guide
This guide keeps the default web port 8443, which is fine for a test setup. For production, use port 443 instead; see Choose the web port. Other pages of this documentation assume port 443 and write URLs without a port.
Step 1: Install the server
-
Install PostgreSQL first, so the package can create the database for you:
-
Download the
bor-serverpackage for your architecture from the GitHub releases page or getbor.dev/download and install it: -
Copy the initial admin password from the installer output. It looks like this:
bor-server: ======================================================
bor-server:  Initial admin credentials
bor-server:    Username: admin
bor-server:    Password: 3f9c...
bor-server:  Change this password immediately after first login.
bor-server: ======================================================
If you missed it, it is stored as
admin_passwordin/etc/bor/server.yaml. -
Add the server's DNS name to the certificate. Edit
/etc/bor/server.yamland setserver.hostnames: -
Open the firewall (if one is active) and start the service:
-
Check that it started:
Look for
HTTPS + enrollment gRPC listening on :8443andAgent policy gRPC (mTLS) listening on :8444.
Details: Installing the server.
Step 2: Log in and secure the admin account
- Open
https://bor.example.com:8443in a browser. The certificate is issued by Bor's own internal CA, so the browser warns about it the first time; accept the warning or trust the CA as described in Installing the server. - Enter
adminas Username, click Continue, enter the password and click Log in. - Open the user menu in the top-right corner and choose Account security. On the Change Password tab, set a new password (at least 12 characters).
- Remove the
admin_passwordline from/etc/bor/server.yaml. It is only used to create the first account and should not stay on disk.
Step 3: Create a node group
- In the sidebar, go to Fleet -> Node Groups.
- Click Create Node Group, enter a name such as
Pilot desktops, and click Create.
Details: Node groups.
Step 4: Deploy the agent on the desktop
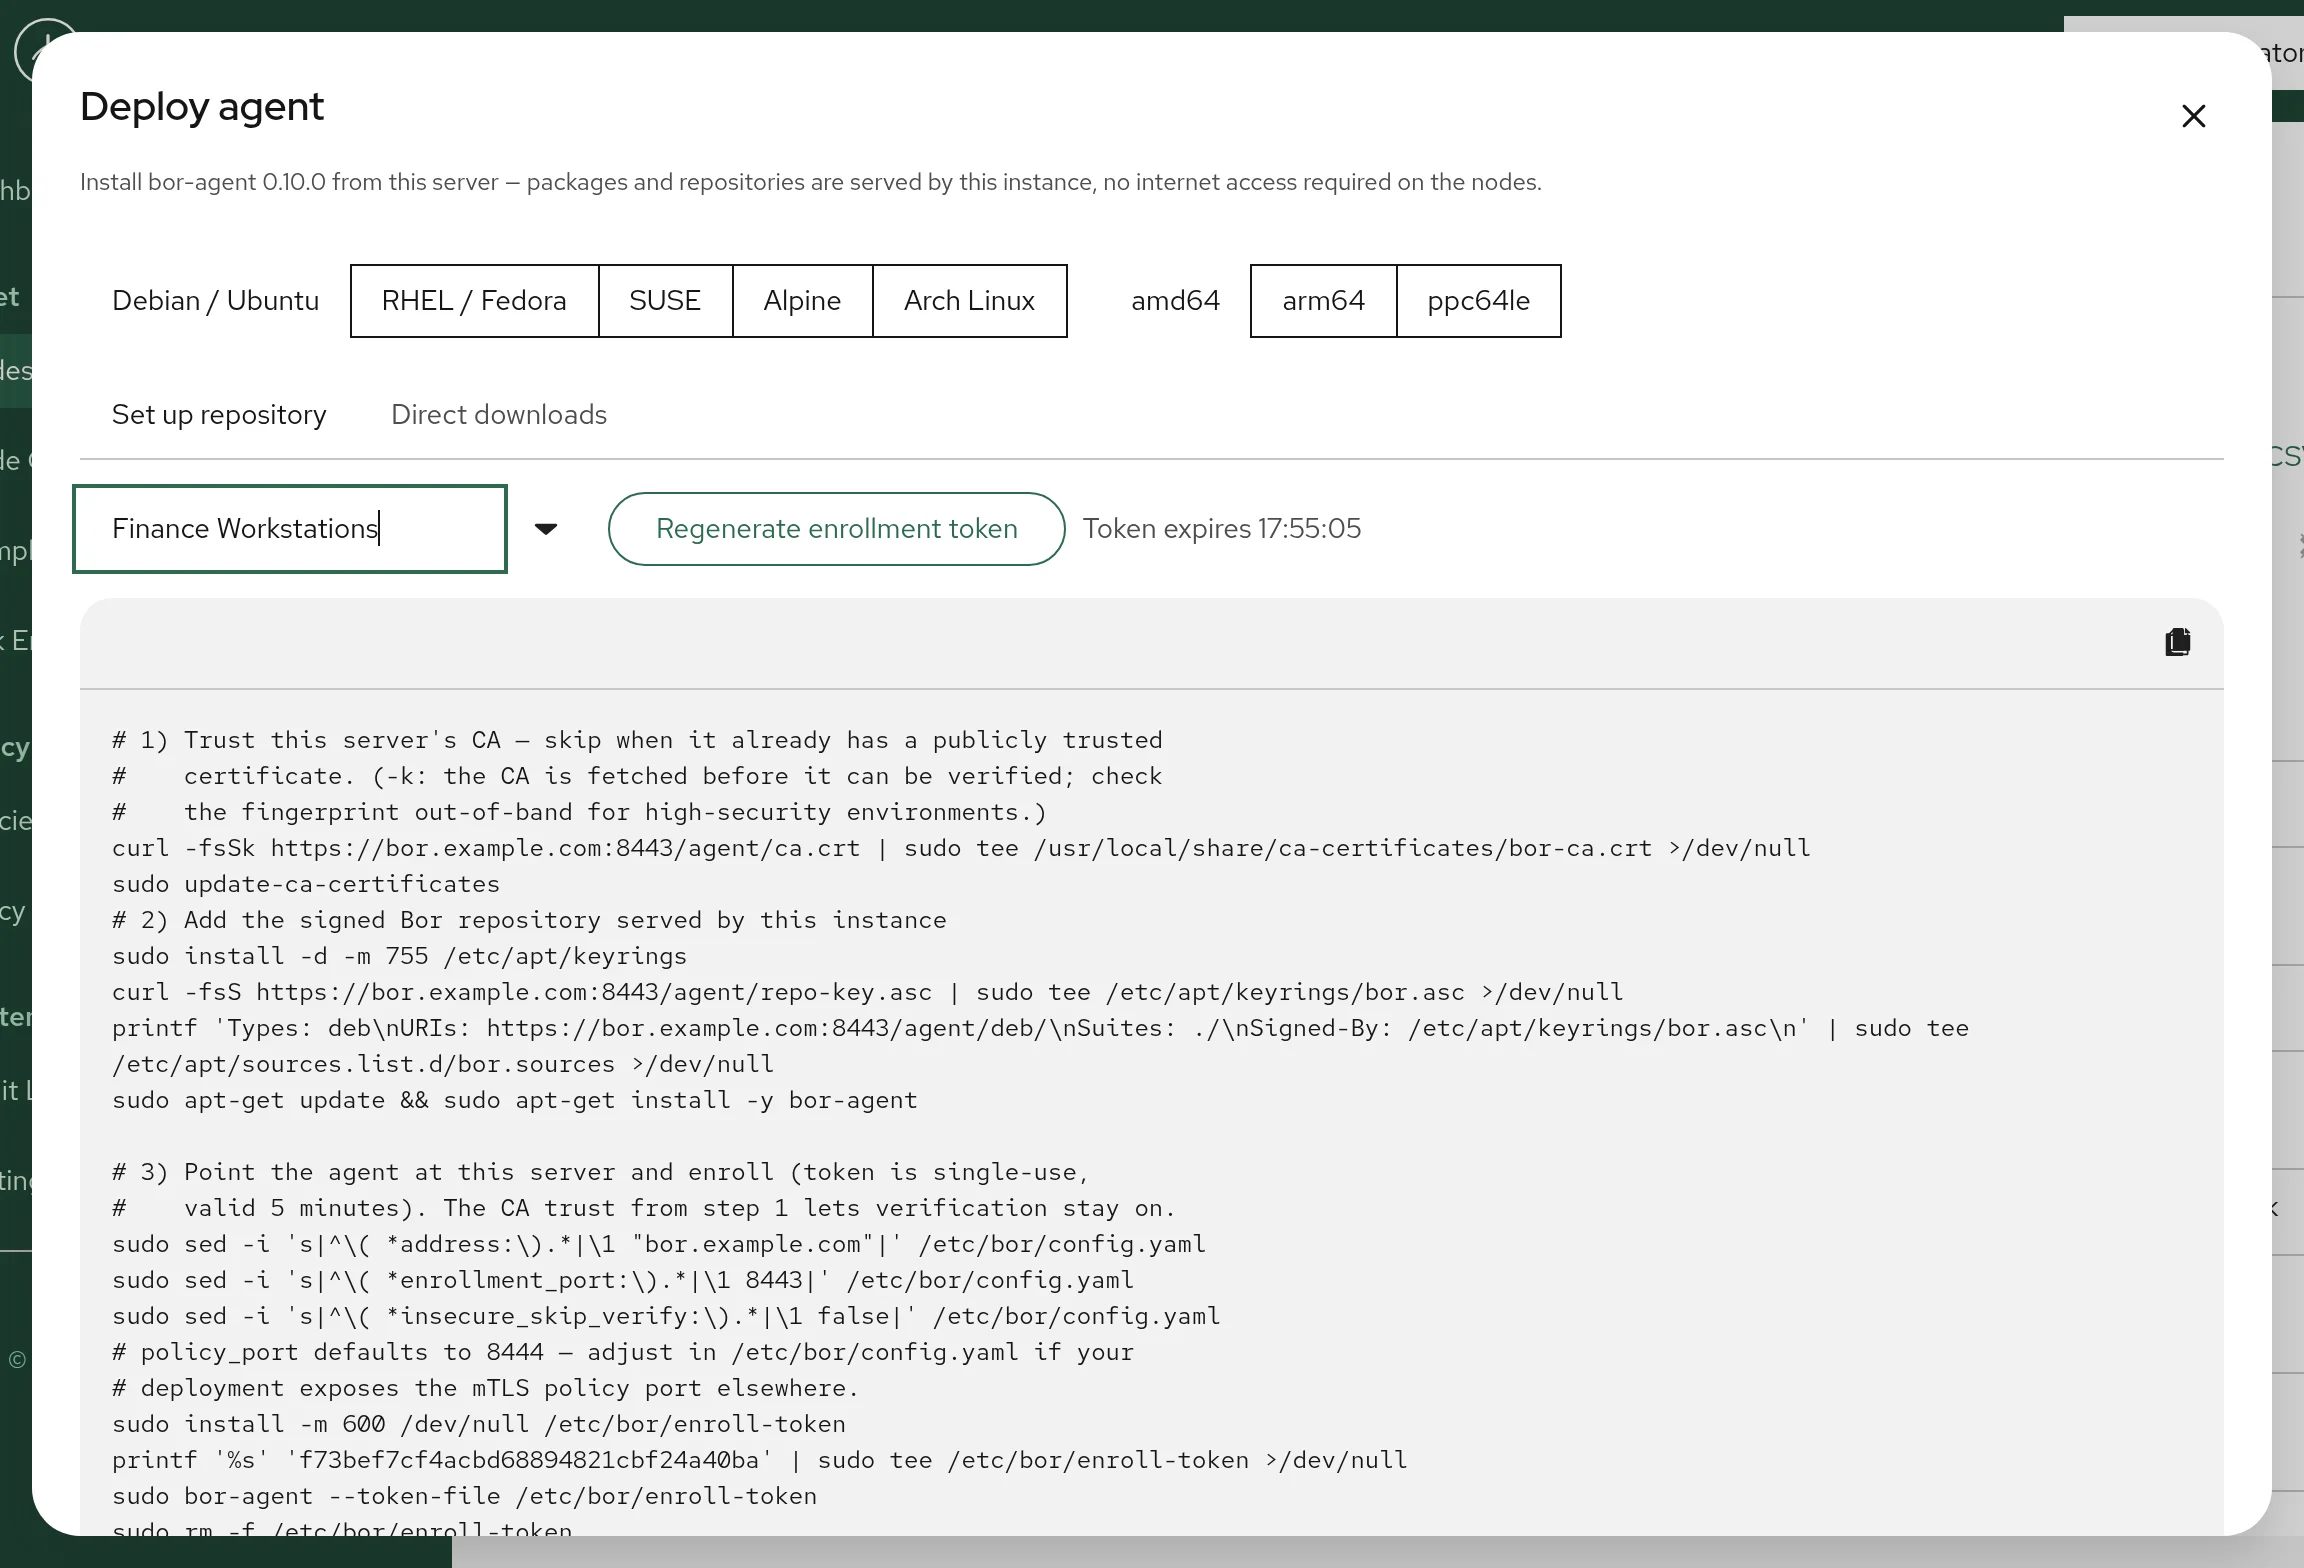
- In the web UI, click the Deploy agent button on the Nodes page (or the download icon in the top bar).
- Pick the desktop's platform (for example Debian / Ubuntu) and architecture.
- In Enroll into node group..., select
Pilot desktopsand click Add enrollment step. The script now contains a one-time token that is valid for 5 minutes. - Click the copy icon and paste the script into a root-capable shell on the
desktop. It:
- trusts the server's internal CA,
- adds the package repository hosted by your server and installs
bor-agent, - points
/etc/bor/config.yamlat your server, - enrolls the agent with the token, and
- runs
systemctl enable --now bor-agent.
- Back in the web UI, open Fleet -> Nodes. The desktop appears with its hostname and an online status within a few seconds.
Details: Installing the agent.
Step 5: Create and release a Firefox policy
- Go to Policy -> Policies and click Create a policy.
- Type: choose Firefox and click Next.
- Details: enter a Name, for example
Firefox baseline, and click Next. - Configuration: in the tree on the left, open the Privacy & Telemetry group and select Disable Telemetry. Turn the Value switch on. Click Next.
- Review: check the summary and click Create policy.
- On the confirmation screen, click Release now and confirm with Release. The policy is now released but not yet delivered anywhere.
Details: Policies and Firefox.
Step 6: Bind the policy to the node group
- On the same confirmation screen, click Assign to a node group (or go to Policy -> Policy Bindings and click Create Binding).
- Select the policy and the
Pilot desktopsgroup, leave Priority at 0, and click Create. - New bindings are created disabled. In the bindings table, turn on the switch in the Binding State column and confirm with Enable.
The server pushes the policy to every node in the group immediately.
Details: Policy bindings.
Step 7: Verify on the endpoint
On the desktop:
-
Look at the managed policy file:
It contains
"DisableTelemetry": trueunder"policies". -
Check the agent log:
You should see a line like
Firefox policies synced to /etc/firefox/policies/policies.json (1 policies). -
Restart Firefox and open
about:policies. The policy is listed as active. -
Optional: test tamper protection. Edit or delete
/etc/firefox/policies/policies.jsonas root. The agent restores it within moments and logsTamper protection: restoring ...; the event also appears in System -> Audit Logs.
In the web UI, Fleet -> Compliance now shows the policy as Compliant on the node.
Next steps
- Turn on multi-factor authentication for your account: Multi-factor authentication.
- Replace the internal certificate with your own or an ACME certificate: TLS and certificates.
- Connect LDAP or Active Directory: LDAP and Active Directory.
- Read Concepts to understand priorities, merging and the policy lifecycle.